Welcome to the primary AI in 5 put up, the place we educate you how one can create wonderful issues in simply 5 minutes! This tutorial relies on this video, which is a step-by-step information on utilizing a big language mannequin to construct a textual content classification mannequin.
Textual content classification is a typical activity in Pure Language Processing that assigns a set of predefined classes to open-ended textual content and on this demonstration, we’ll use Cohere AI’s embedding mannequin to seize semantic relationships and classify various kinds of take a look at questions from the Pupil Questions dataset. Whereas the dataset incorporates round 120,000 questions, we’ll work with a smaller subset of 5,000 questions for simplicity.
- Here is the place you’ll be able to obtain the Python utility used.
- Here is the hyperlink to the dataset on Kaggle.
- Here is the hyperlink to the shortened 5000 pattern dataset used.
- Here is the hyperlink to the shortened 5000 pattern dataset used AFTER being processed by the utility in order that it’s now in Clarifai format.
Dataset Overview:
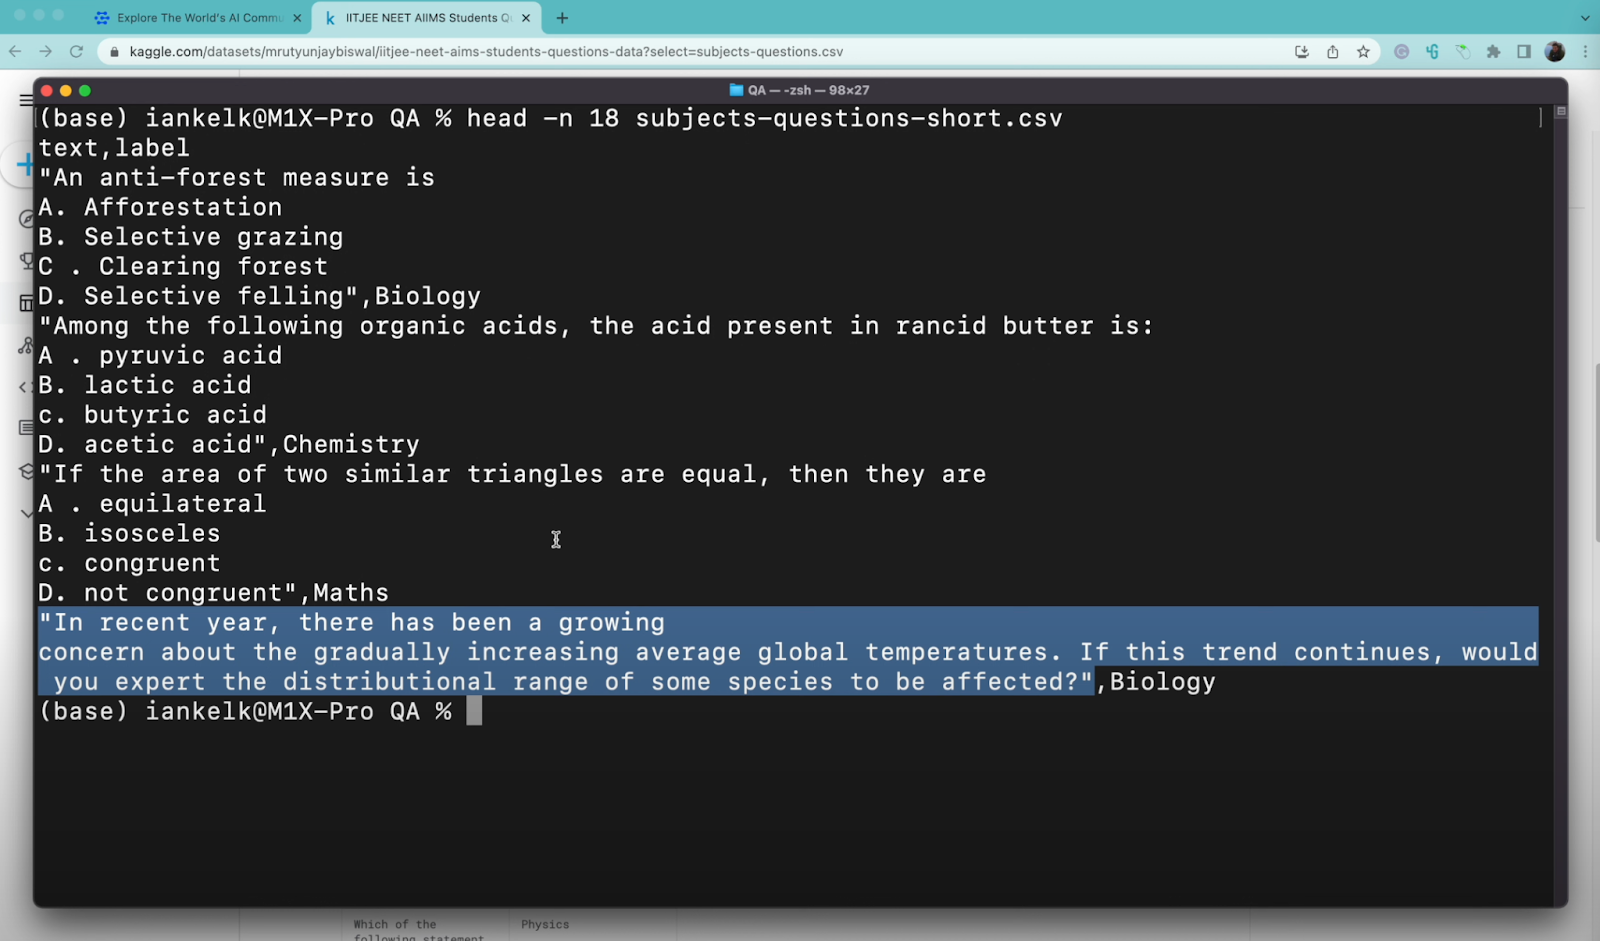
Let’s begin by looking on the dataset we’re working with. We’ll be utilizing the scholar questions dataset which incorporates roughly 120,000 take a look at questions. Nevertheless, to optimize the training expertise, we’ll slim them right down to about 5,000 take a look at questions.

The dataset is a structured CSV file with two columns: ‘textual content’ and ‘label.’ The ‘textual content’ column incorporates the query textual content, and the ‘label’ column incorporates the class of the query, which might be one in every of 4 topics: physics, chemistry, biology, or math.
Information Preprocessing:
Let’s Begin with a Information Conversion utilizing the Python script to transform and put together our dataset for classification. This script additionally helps us cut up the info into coaching and testing units.
First we have to specify if there are columns with a number of values. In our situation, they do not, so our response will likely be a ‘no’.

Subsequent, the script seems to be for the column with the textual content, which on this case is the primary column. It will probably additionally acknowledge a number of classes within the second column, equivalent to chemistry, math, biology, and physics. Additionally, it determines that there’s just one extra column in addition to the ‘textual content’ column, so it routinely selects ‘labels’ because the column for labels.

The Python software then asks if we wish to divide our dataset right into a coaching set and a testing set. We agree with this and select ‘sure.’ We make this alternative as a result of we wish to see how effectively our mannequin performs on new and unseen knowledge.
Additionally, there is no must shuffle the info for this explicit undertaking, we’ll reply with a ‘no’ when requested to take action. Additionally for splitting the dataset we’re dividing the info into coaching and testing units, eliminating the necessity for a validation set.
Now with all these responses, 80% of the dataset is devoted to coaching and relaxation for testing. Now the info is neatly organized into two distinct recordsdata: a coaching set and a testing set.
Coaching the Textual content Classification Mannequin:
First let’s create a brand new software. Signup to Clarifai right here and create a brand new App by specifying the App ID, Brief Description and choosing the Base Workflow.
Right here we have now set the bottom workflow as Textual content which is a single-model workflow of textual content embedding mannequin for basic english textual content.

Now we have now to vary this to Cohere Textual content Workflow. So go the workflow part and duplicate the bottom workflow which is Textual content and rename it as ‘Textual content-Cohere’ and likewise by altering the Textual content Embedder from multilingual-text-embedding to cohere-text-to-embeddings mannequin.

Now save the workflow and go to the App settings to vary the bottom workflow from Textual content to Textual content-Cohere.

Information Add
Now let’s add the Coaching and Take a look at knowledge. Go to the Inputs part within the Sidebar and click on on add to add the coaching and testing knowledge.
It takes some time to add the info since every textual content enter you add will likely be handed via the Cohere embedding mannequin to course of them.

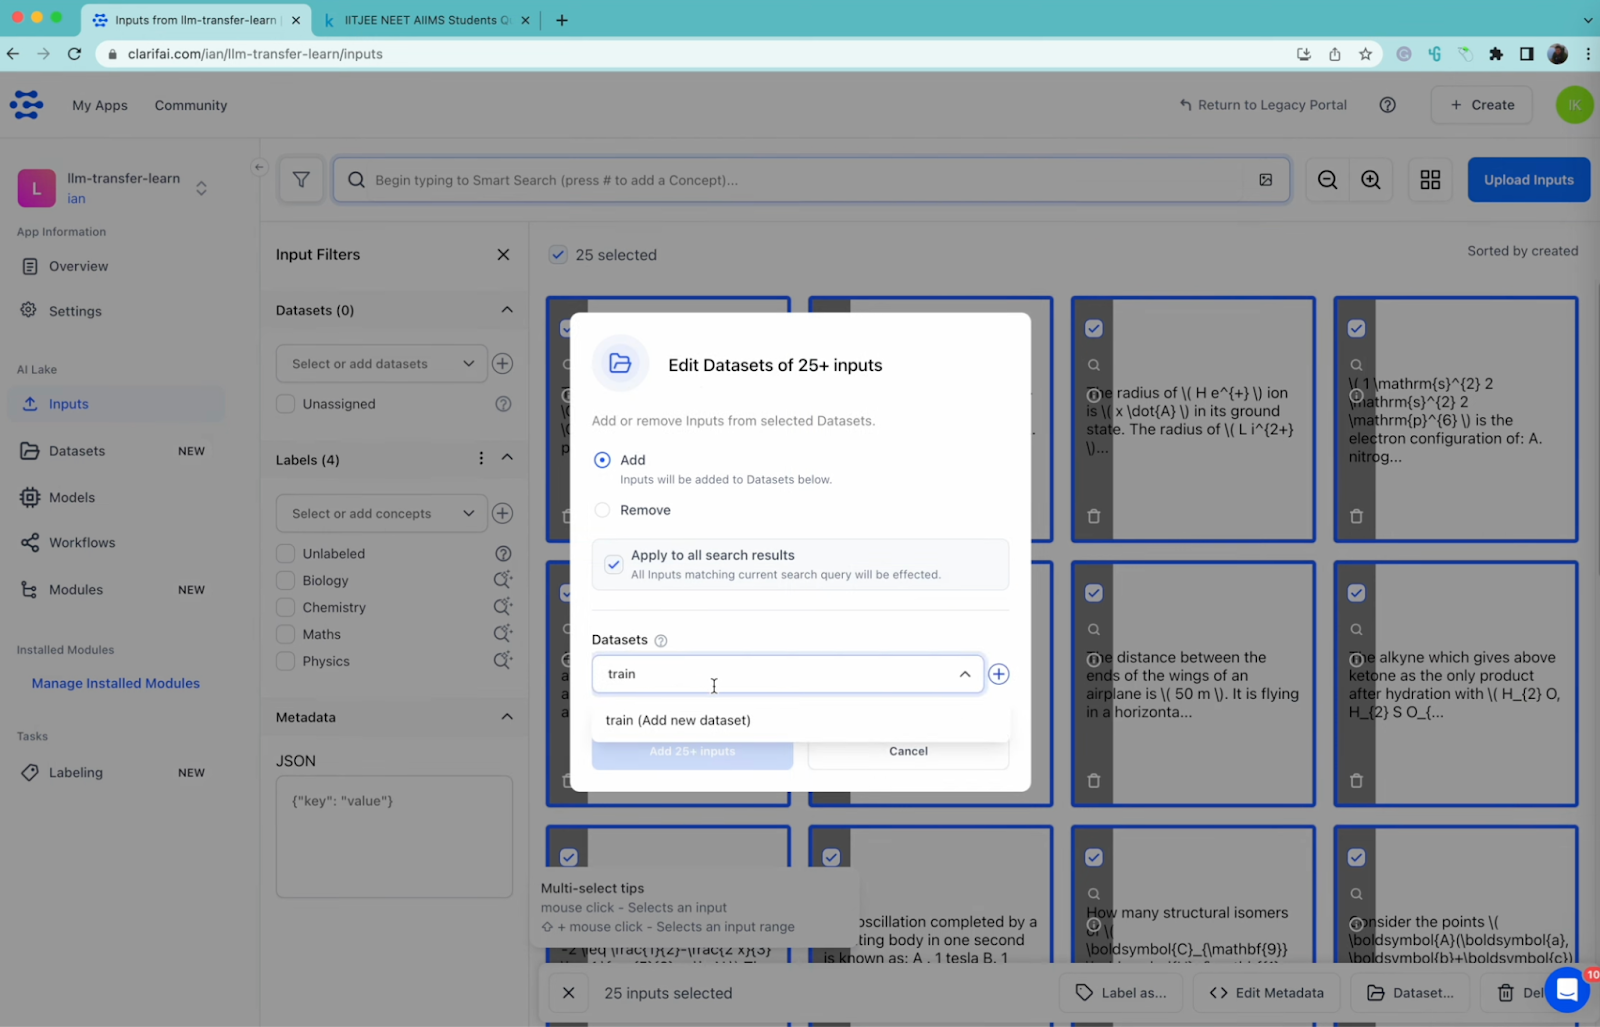
As soon as the info is uploaded, choose all the info and add them to the coaching dataset.

Choose all of the search outcomes, add a brand new dataset practice after which click on on Add inputs. This may make sure that all of the uploaded knowledge is underneath the dataset named practice. Observe the same steps to add the Take a look at Dataset.
Coaching the Classifier utilizing Switch Studying
Now, let’s practice our textual content classification mannequin. First, go to Fashions Part in your Software and choose the Create Mannequin possibility on the High Proper Nook

Now choose the choice Switch Studying Classifier

Now specify the Mannequin Id, select the ‘practice’ dataset, and select ALL the ideas within the coaching dataset with labels and hit Practice.

Evaluating the Mannequin Outcomes:
As soon as the Coaching is finished, we consider the mannequin’s efficiency on each the Coaching and testing datasets. Here is the outcomes on the Coaching Dataset.
For the reason that mannequin is already skilled on this dataset it achieves excessive scores for ROC/AUC, Precision, Recall, and F1 Rating.

On the take a look at knowledge, which incorporates the examples it hasn’t seen earlier than, it nonetheless performs effectively, given the restricted subset used for coaching.

And that is tips on how to use Clarifai’s platform to coach a textual content classification mannequin with Cohere AI’s embedding mannequin on a textual content dataset. We have proven knowledge preprocessing, mannequin creation, coaching, and efficiency analysis. Thanks for studying!